

Torting the Cakes
Begin by cutting each of the cakes into three even layers, discarding any uneven cake tops. Place the 8 in (20 cm) cake between the metal bars. In a sawing motion, move the serrated knife across the top of the bars through the cake while your opposite hand steadies on top. Set aside the sliced layer.
Repeat this step for the next layers. Finally, discard the leftover tops and set the layers aside.
Now repeat the cutting process with the second 8 inch (20 cm) cake and the two – 6 in (15 cm) cakes. Set them aside.
Step 1: Torting the Cakes
- Génoise sponge, 6 in & 8 in, desired flavor, reserved from unit 5, prepared - 2 recipes
Filling Each Cake
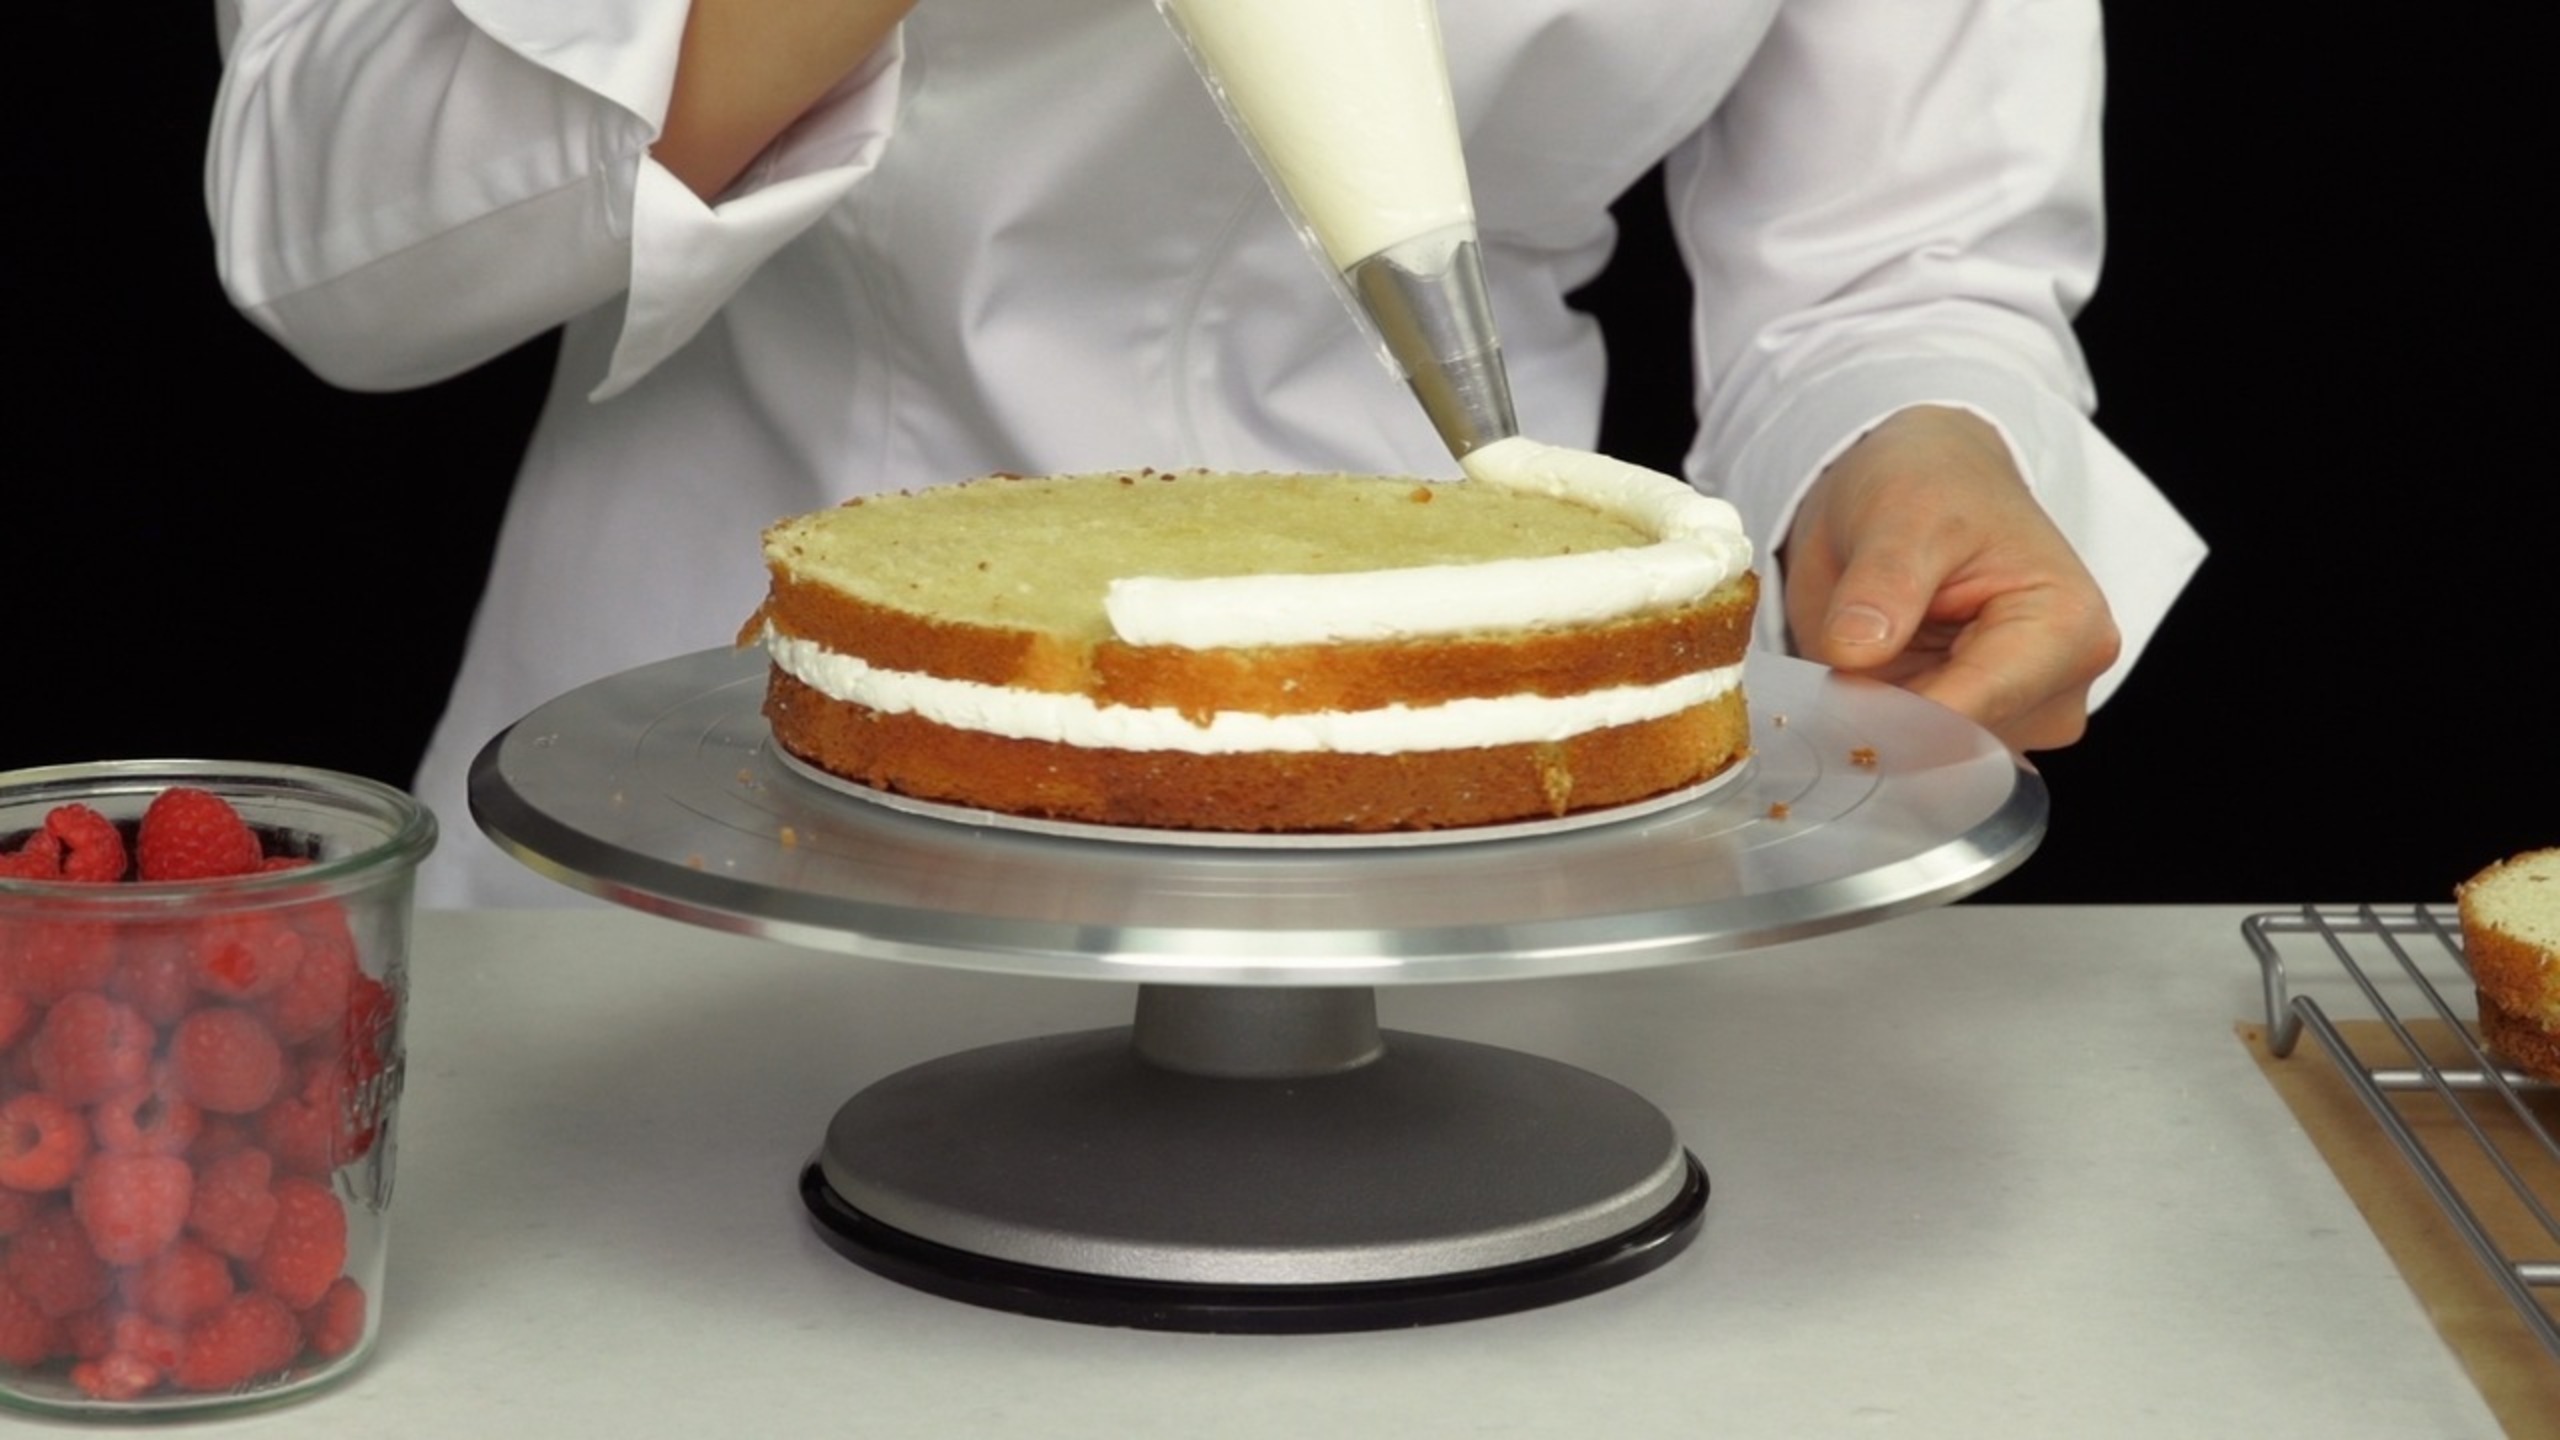
The next step is to fill each cake. Set an 8 in (20 cm) cake board on top of the cake stand lined with a nonslip shelf liner. In the center of the cake board, pipe a ¼ in (0.6 cm) size dollop of buttercream to secure the first layer of sponge cake to the cake board.
Generously brush the top with soaking syrup using a pastry brush.
Pipe a ring of buttercream around the outside edge of the cake. This will prevent the filling from seeping out of the cake later on.
Now pipe a crème légère spiral beginning in the center to the buttercream edge.
Then dot this layer with fresh raspberries.
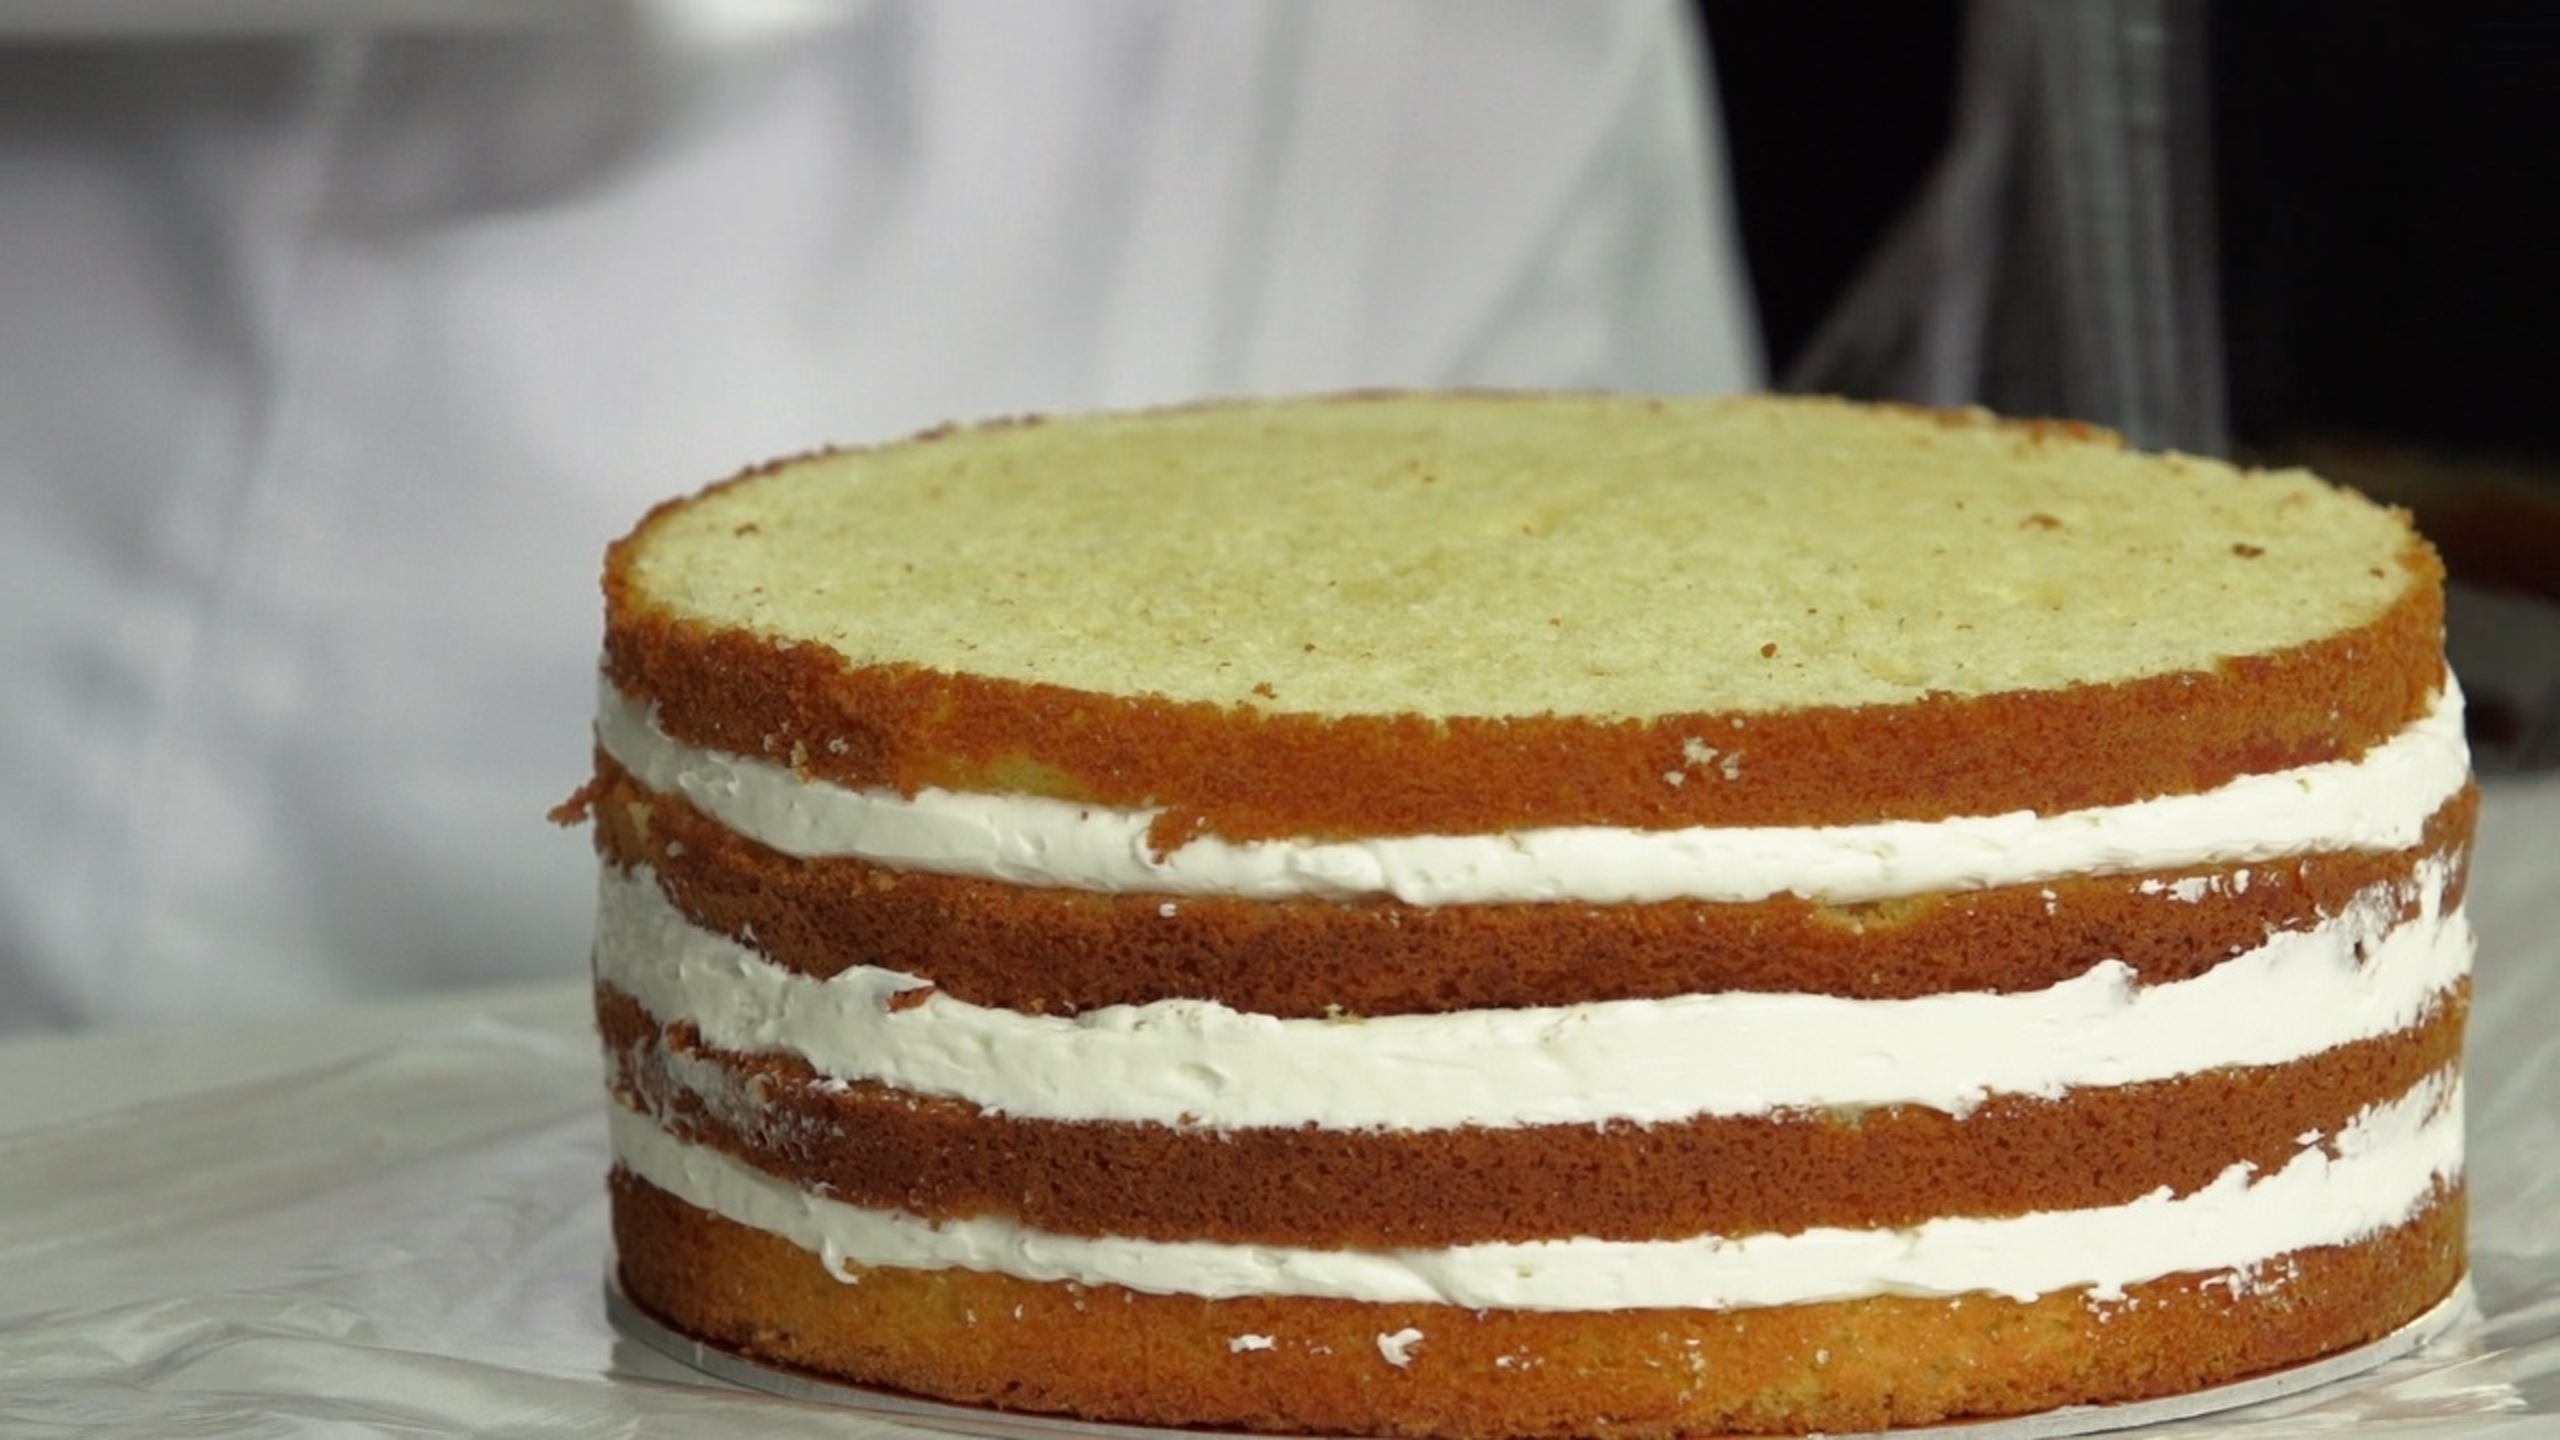
Place the other cake layer on top and level it by lightly pressing with a cake board. Ensure that the layers are stacked straight. Repeat each step for the second layer.
For the third layer, repeat each step, but use lemon cream as the filling and do not dot it with fresh raspberries.
For the fourth and final top cake layer, soak it on your work surface. Flip it over and place it with the soaked side down on the other layer. Level it by lightly pressing with a cake board.
Smooth any excess buttercream that has seeped out the sides using an offset spatula.
Then cover it with plastic wrap and set it aside in the refrigerator for 1 hour or until the buttercream is firm.
Now repeat these steps for the smaller cake making sure to use a 6 in (15 cm) cake board for the base.
Step 2: Filling Each Cake
- 670 g Italian meringue buttercream, prepared
- Simple syrup or soaking syrup, 1 recipe, prepared
- 850 g Crème légère, prepared
- 425 g (75 pieces) Fresh raspberries
- 1000 g Lemon cream, prepared
Applying the Crumb Coat
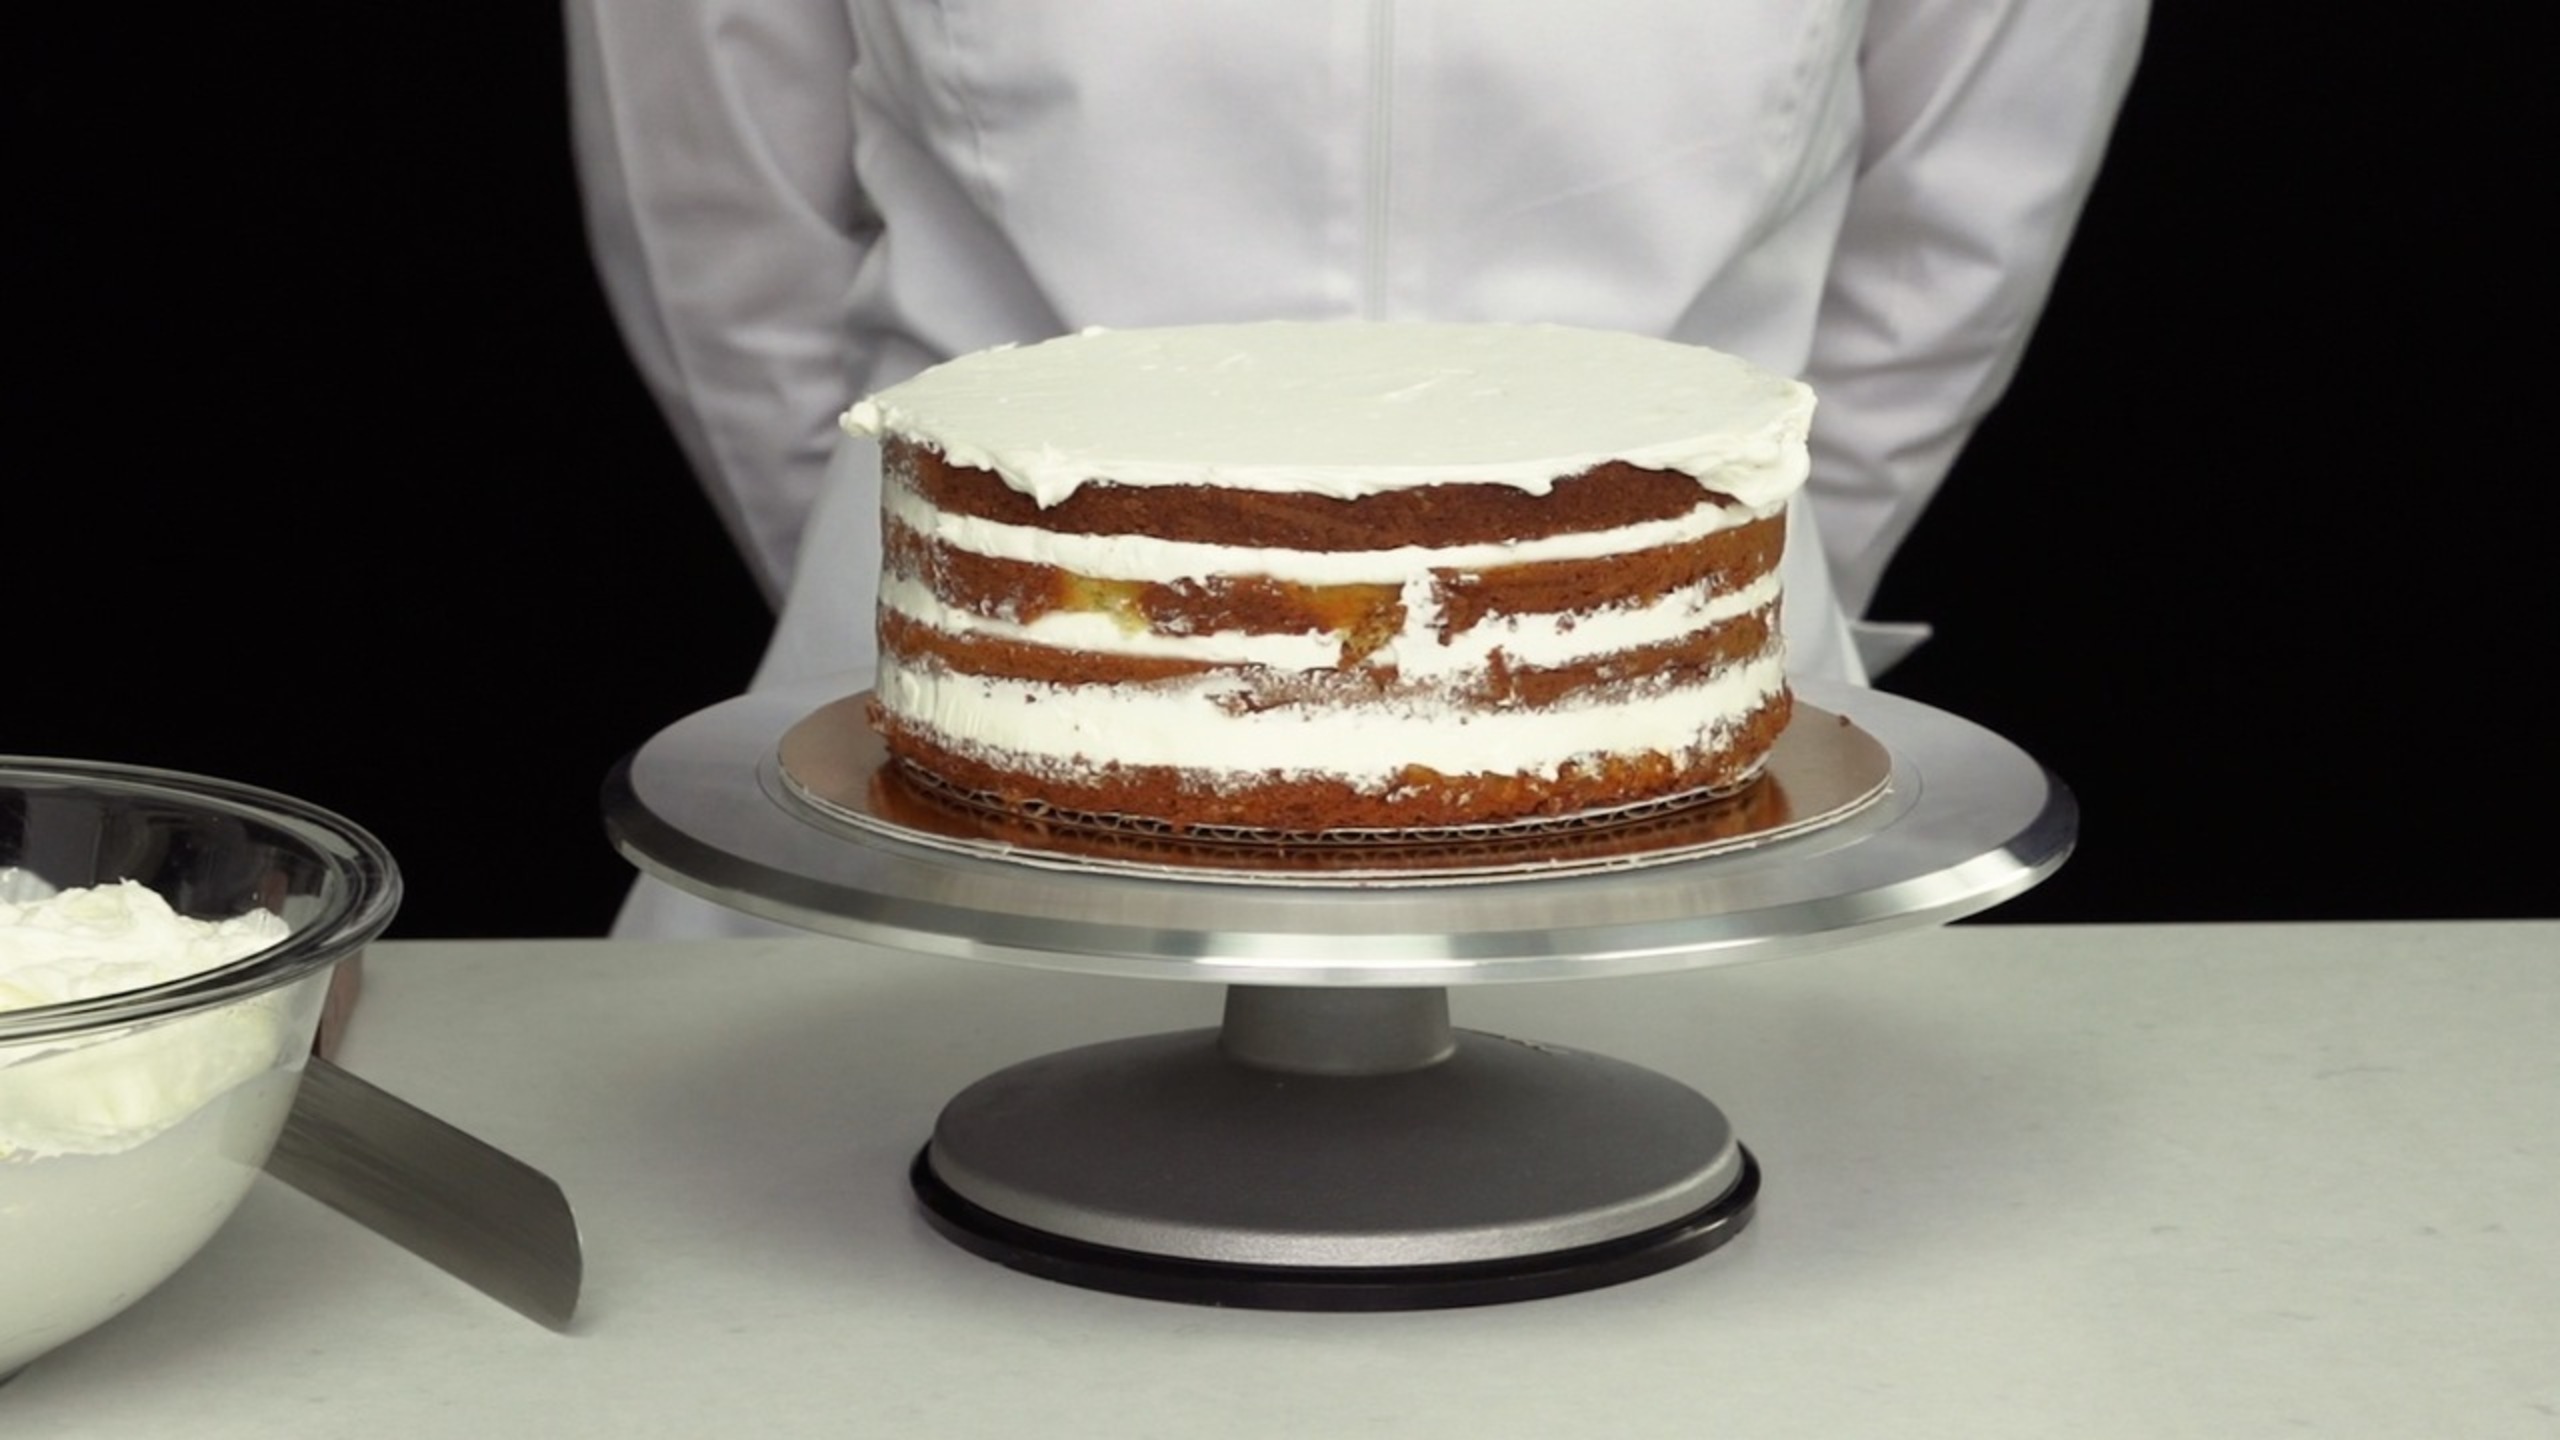
Now apply the crumb coat. Form masking tape loops and place them in the center of a 10 in (25 cm) cake board. Place the large cake on top.
Apply buttercream on top of the cake. Spread out the buttercream from the center to the edge in a swivel motion using an offset spatula while simultaneously turning the cake stand with the opposite hand.
For the side of the cake, put a small amount of buttercream on the tip of the offset spatula. Next, apply the same swivel motion to the side of the cake while simultaneously turning the cake stand. Continue to spread the buttercream entirely around the cake. At this stage, the side will not be completely smooth.
To smooth the side of the cake batter, gently touch the edge of a metal bench scraper on the side of the cake and rest it on the cake stand. Next, open the bench scraper to a 45-degree angle.
Turn the cake stand without moving the bench scraper. Continue to turn it until there is an even layer of buttercream distributed around the cake.
Trim the excess buttercream on the top by dragging it from the edge to the center using an offset spatula. Clean the offset spatula after each scrape.
Repeat these steps for the smaller cake. Next, place both crumb-coated cakes into the refrigerator for 1 hour or until the buttercream is firm.
Step 3: Applying the Crumb Coat
The Final Buttercream Coat
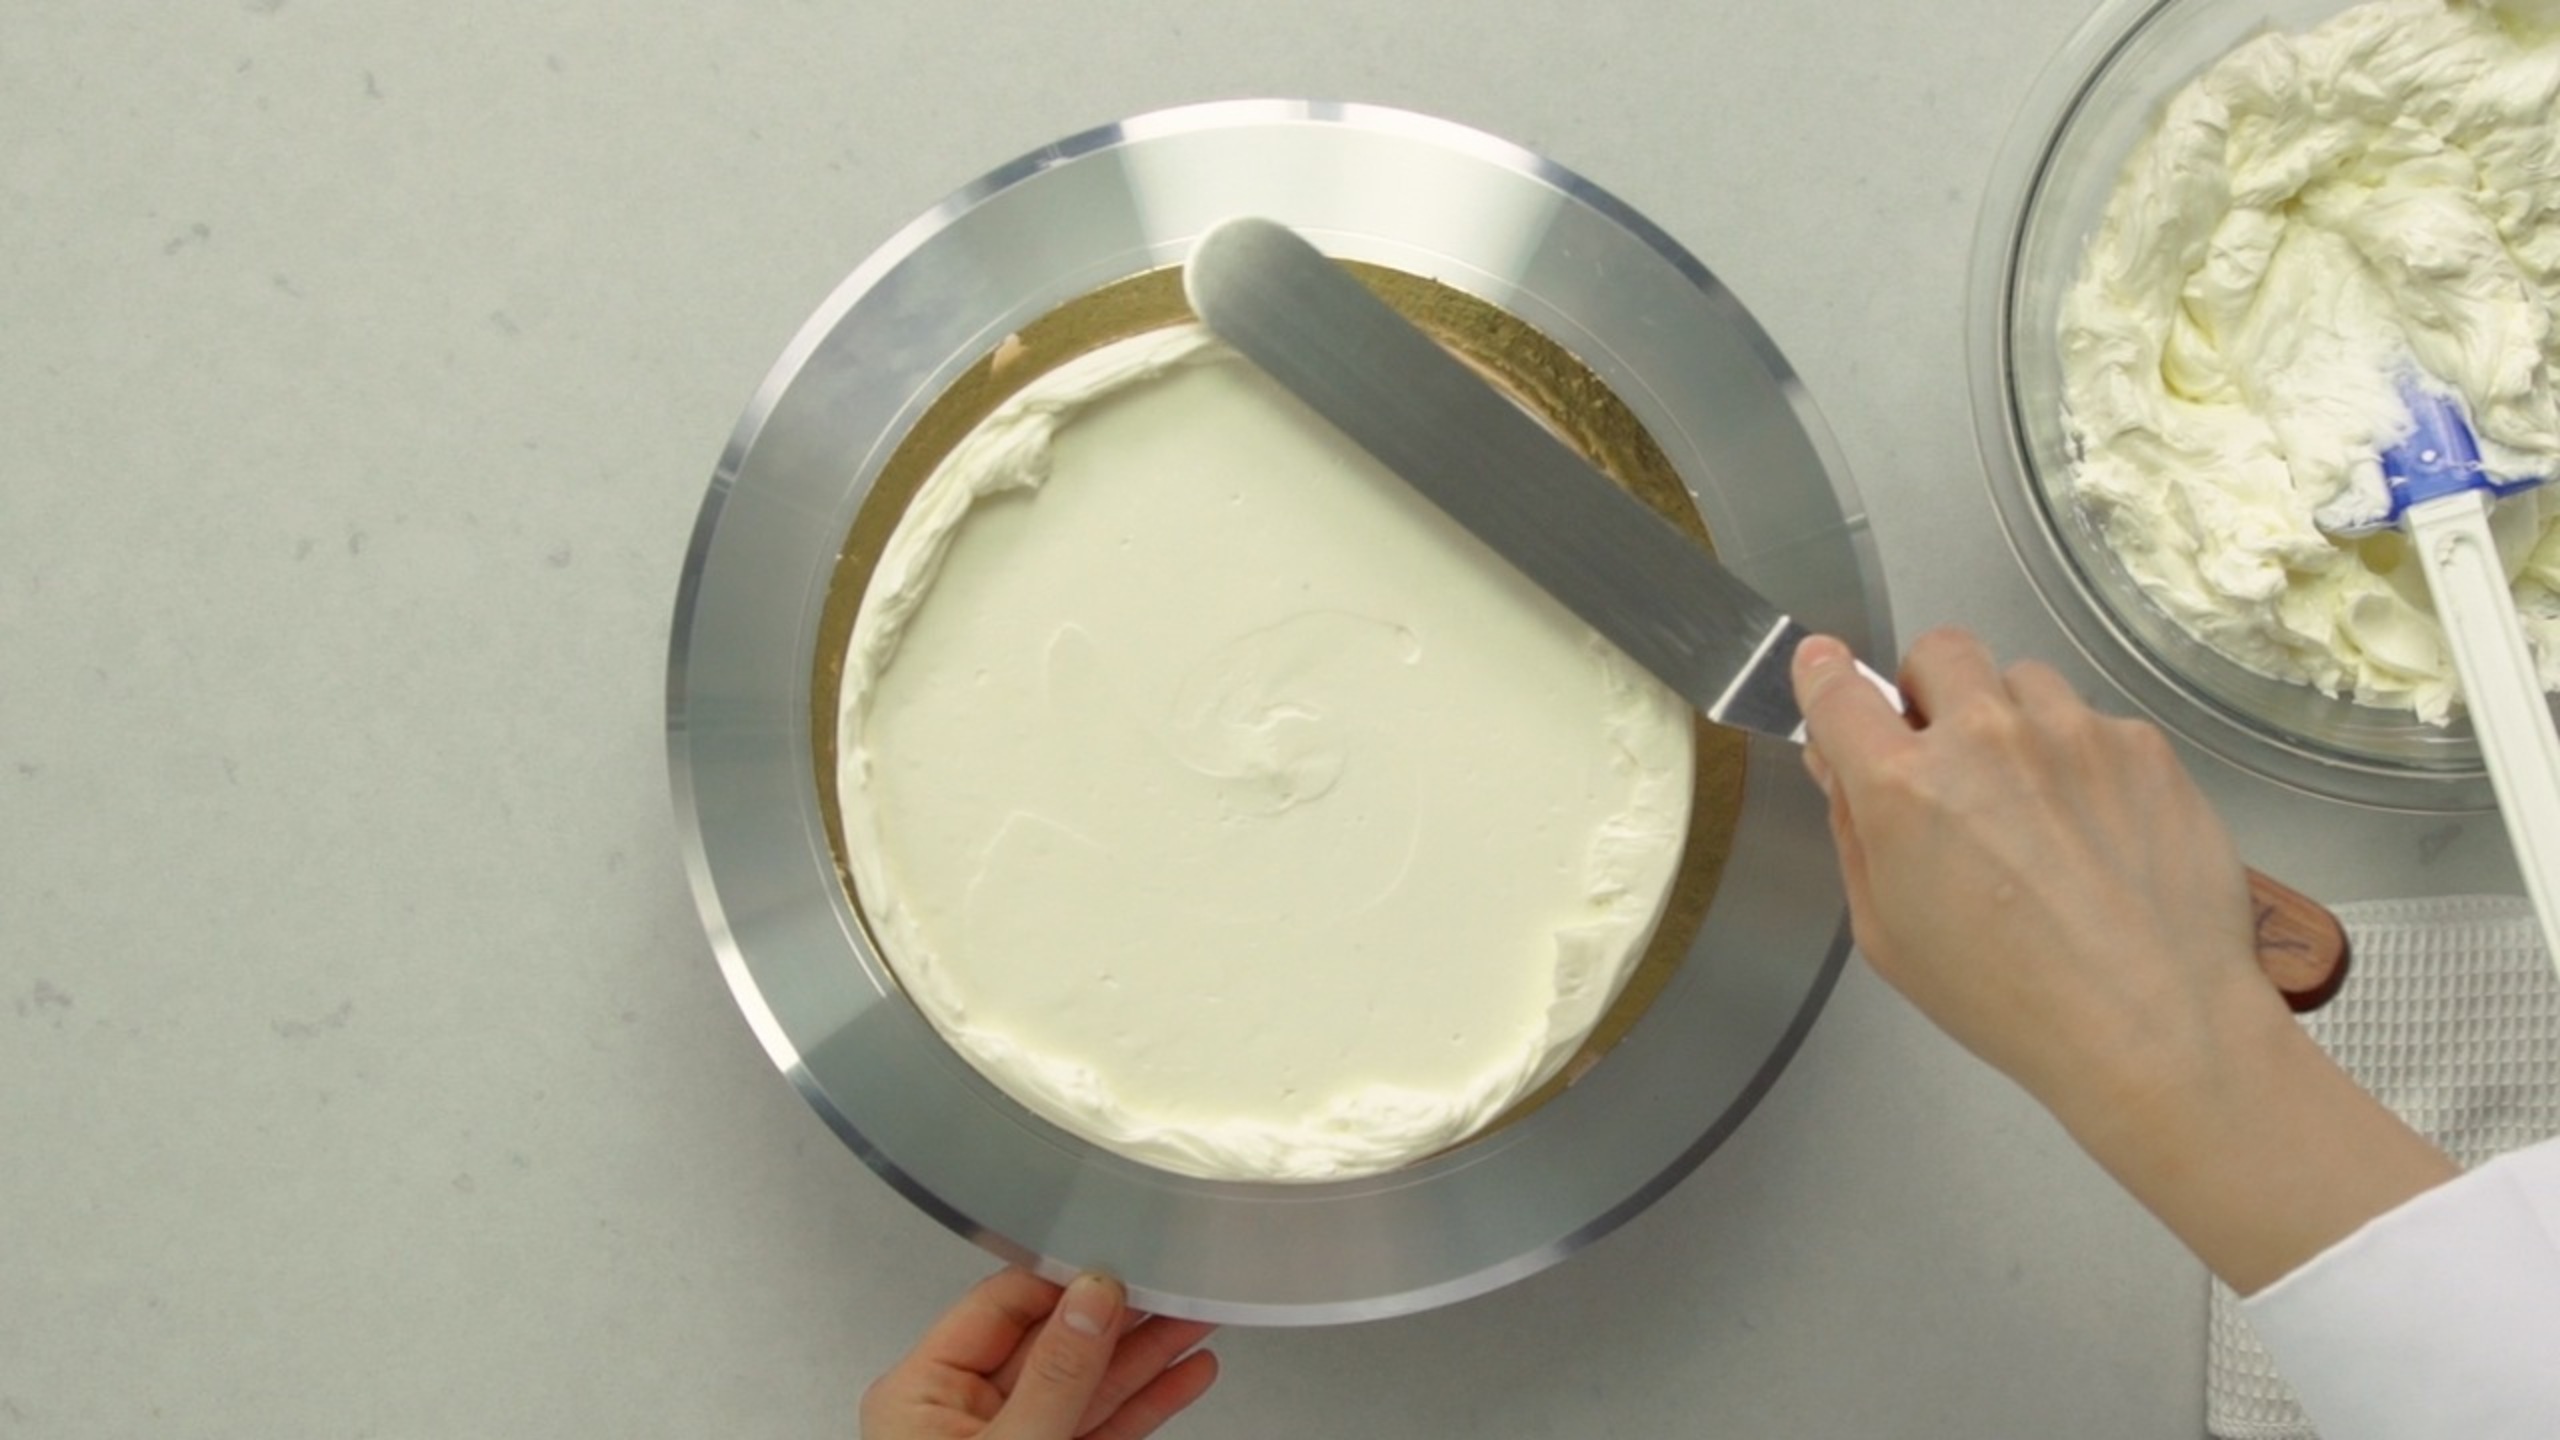
For the final buttercream coat, place a generous amount of buttercream on the top of the cake. Then, just as you did with the crumb coat, apply the buttercream in a swivel motion while simultaneously turning the cake stand.
Repeat this step for the side of the cake using a generous amount of buttercream, but now you need to build a wall of buttercream about 1 in (2.5 cm) above the top edge of the cake. Again, the excess buttercream will allow you to make the top properly smooth.
Focusing on the side first, gently touch the edge of the metal bench scraper on the side of the cake and rest it on the cake stand. Open the bench scraper to a 90-degree angle. Turn the cake stand without moving the bench scraper. Continue to turn until there is an even layer of buttercream distributed around the cake. The thickness of the buttercream layer should be 3/16 in (4 mm – 5 mm ) thick. If there are any uneven areas, fill them in with a small amount of buttercream. Then smooth them out with a bench scraper.
Carefully scrape the buttercream on the top at a slight angle from the outside edge and pull it towards the center. Clean the offset spatula after each scrape. The top edge should be sharp, not rounded.
Repeat the same steps for the smaller cake. Place both of the cakes into the refrigerator for 1 hour or until the buttercream is firm.
Step 4: The Final Buttercream Coat
Stacking the Cakes
Stacking the cake is the last stage of the assembling process. First, form masking tape loops and place them in the center of the cake board or drum you will be using to stack the cake.
Transfer the larger of the two cakes, leaving it on the board the same size as the cake, to the new cake board.
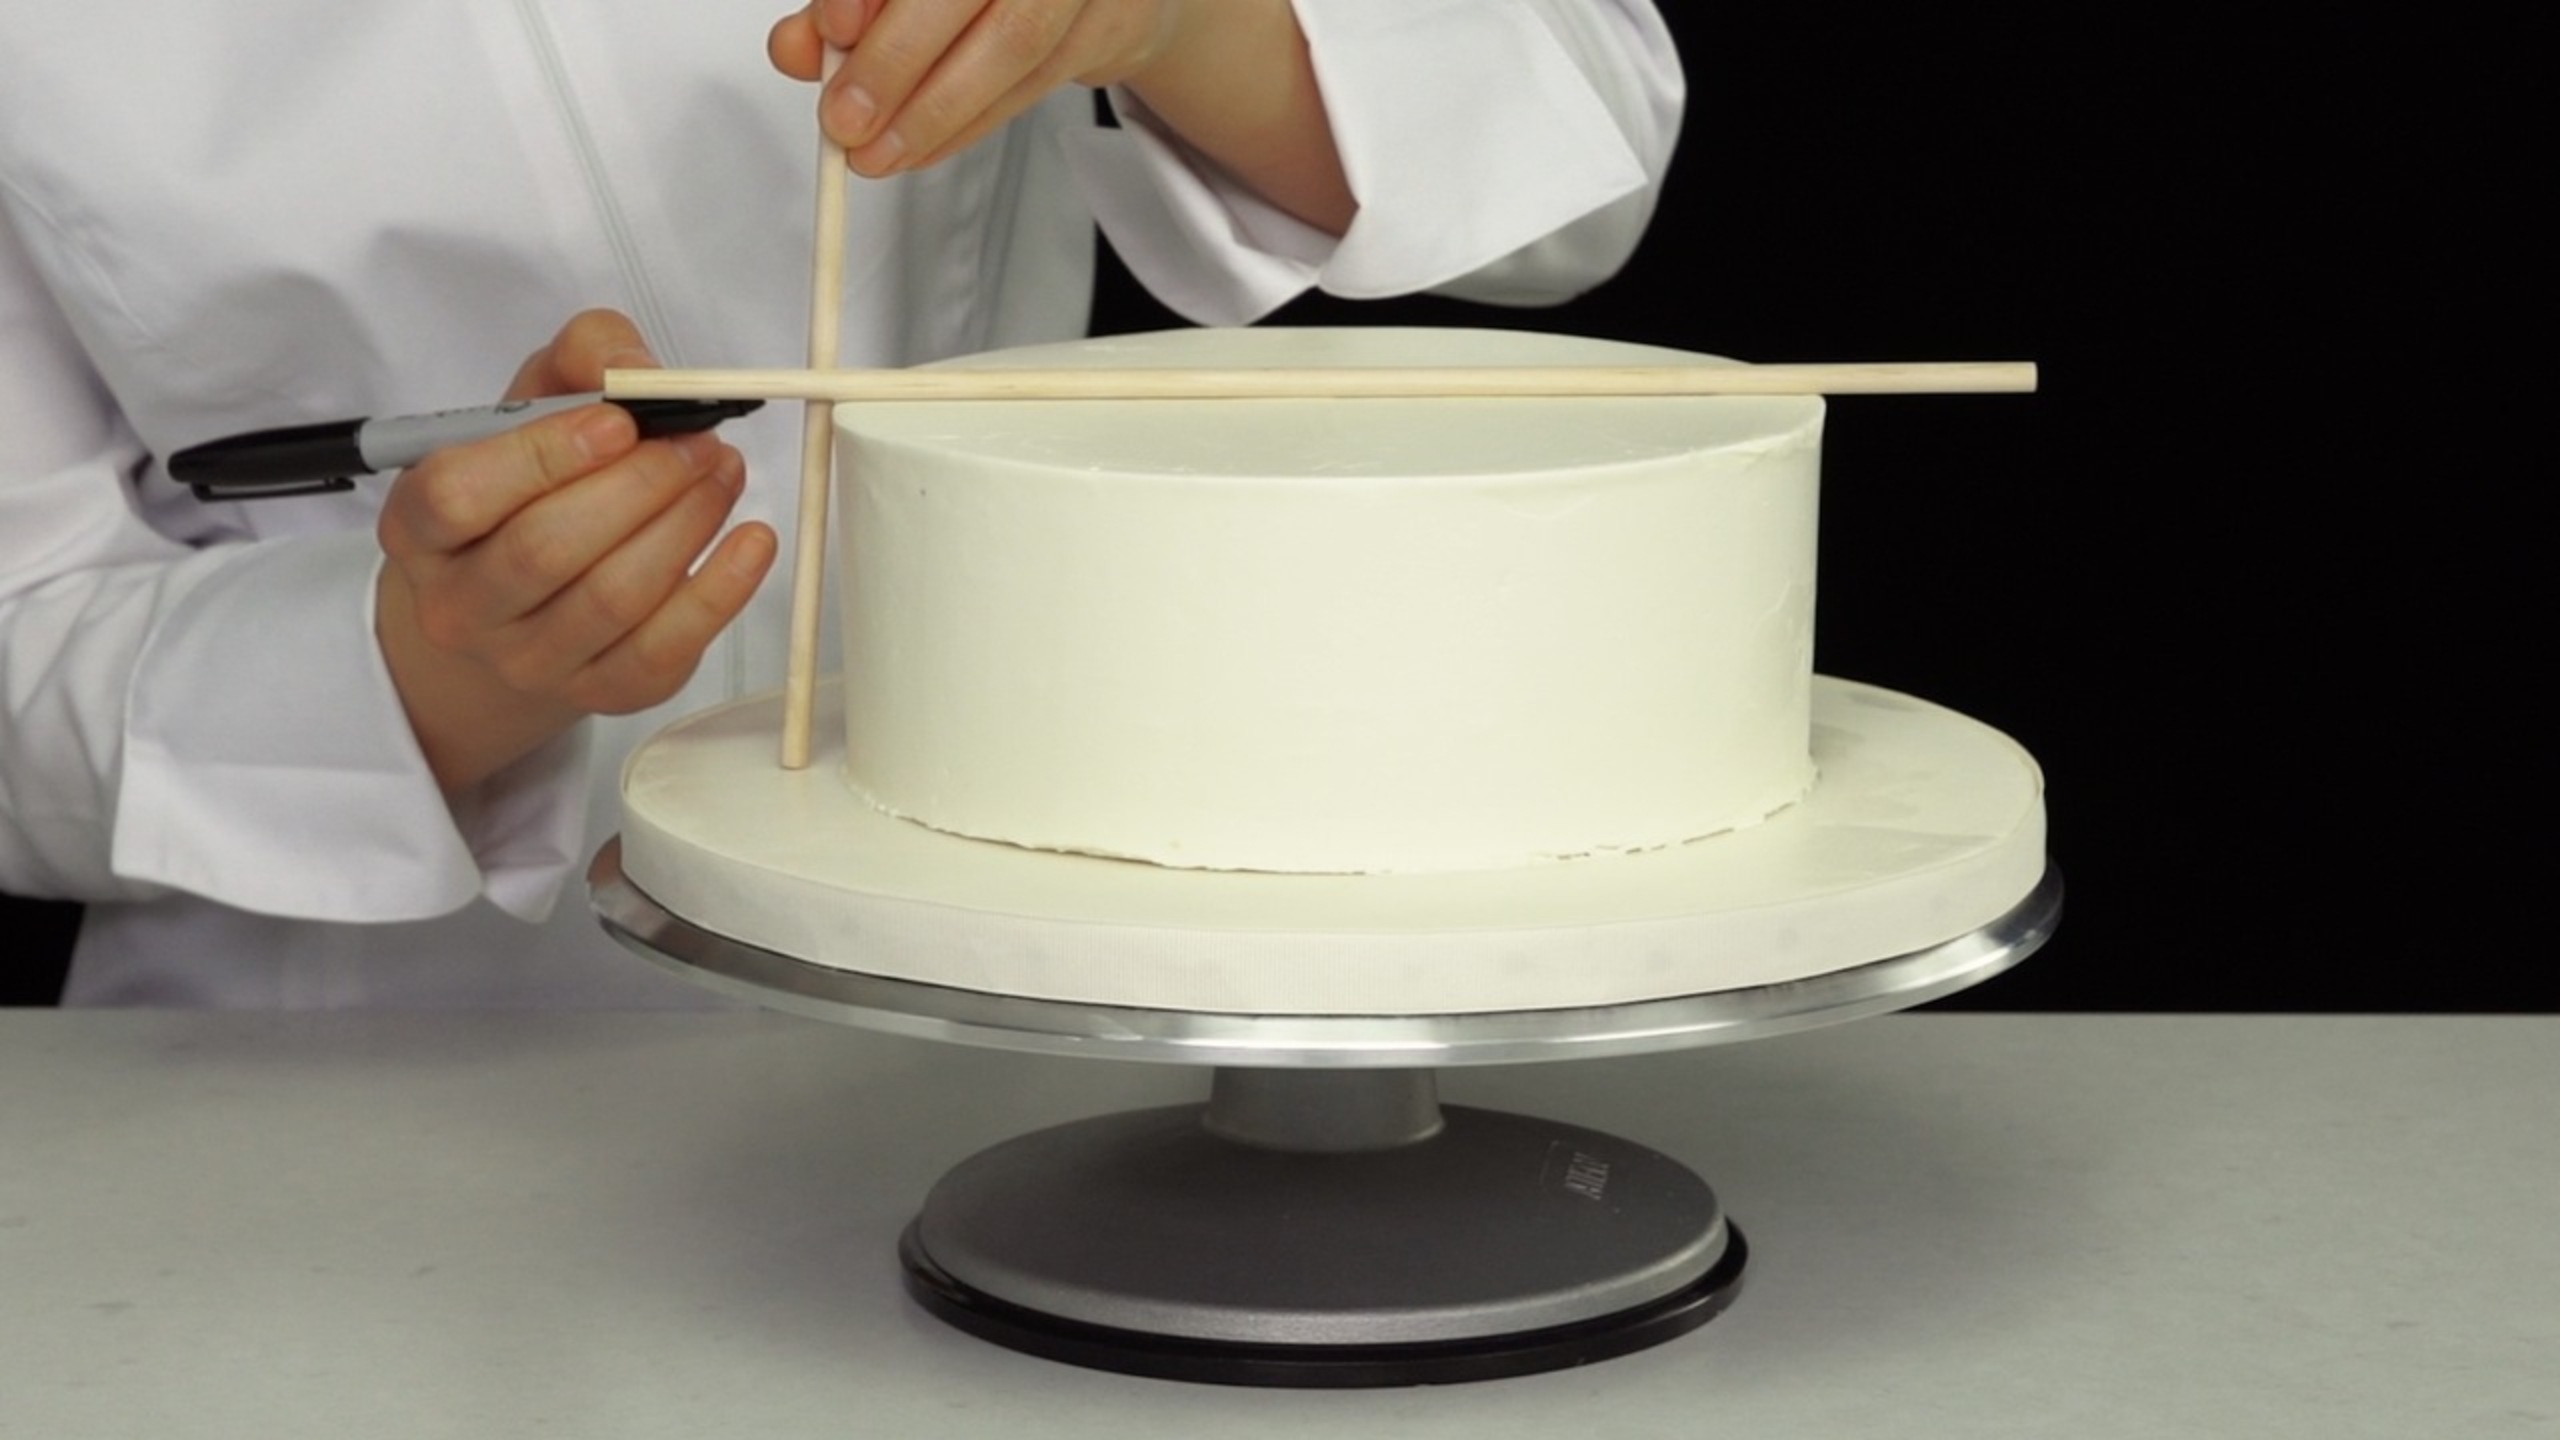
Place a dowel horizontally on top of the cake. Then place another dowel vertically on the cake board. Mark the vertical dowel at the top edge of the cake. The dowels will support the weight of the smaller cake.
Remove the dowel and cut it on the drawn line using cutters. This will now be your guide for the other three dowels.
Gently tap the dowels back into the cake using a remaining dowel and a rubber mallet.
Now center the smaller cake on top of the larger cake.
To secure both cakes, use another dowel for the center rod. Place a dowel horizontally on top of the smaller cake. Then place another dowel vertically on the cake board. Mark the vertical dowel at the intersection and cut it.
Then sharpen the cut side with a pencil sharpener. Now, insert it into the center and through the cake board using a remaining dowel and a rubber mallet.
Fill in the top hole with buttercream using an offset spatula.
Step 5: Stacking the Cakes
Finishing the Details
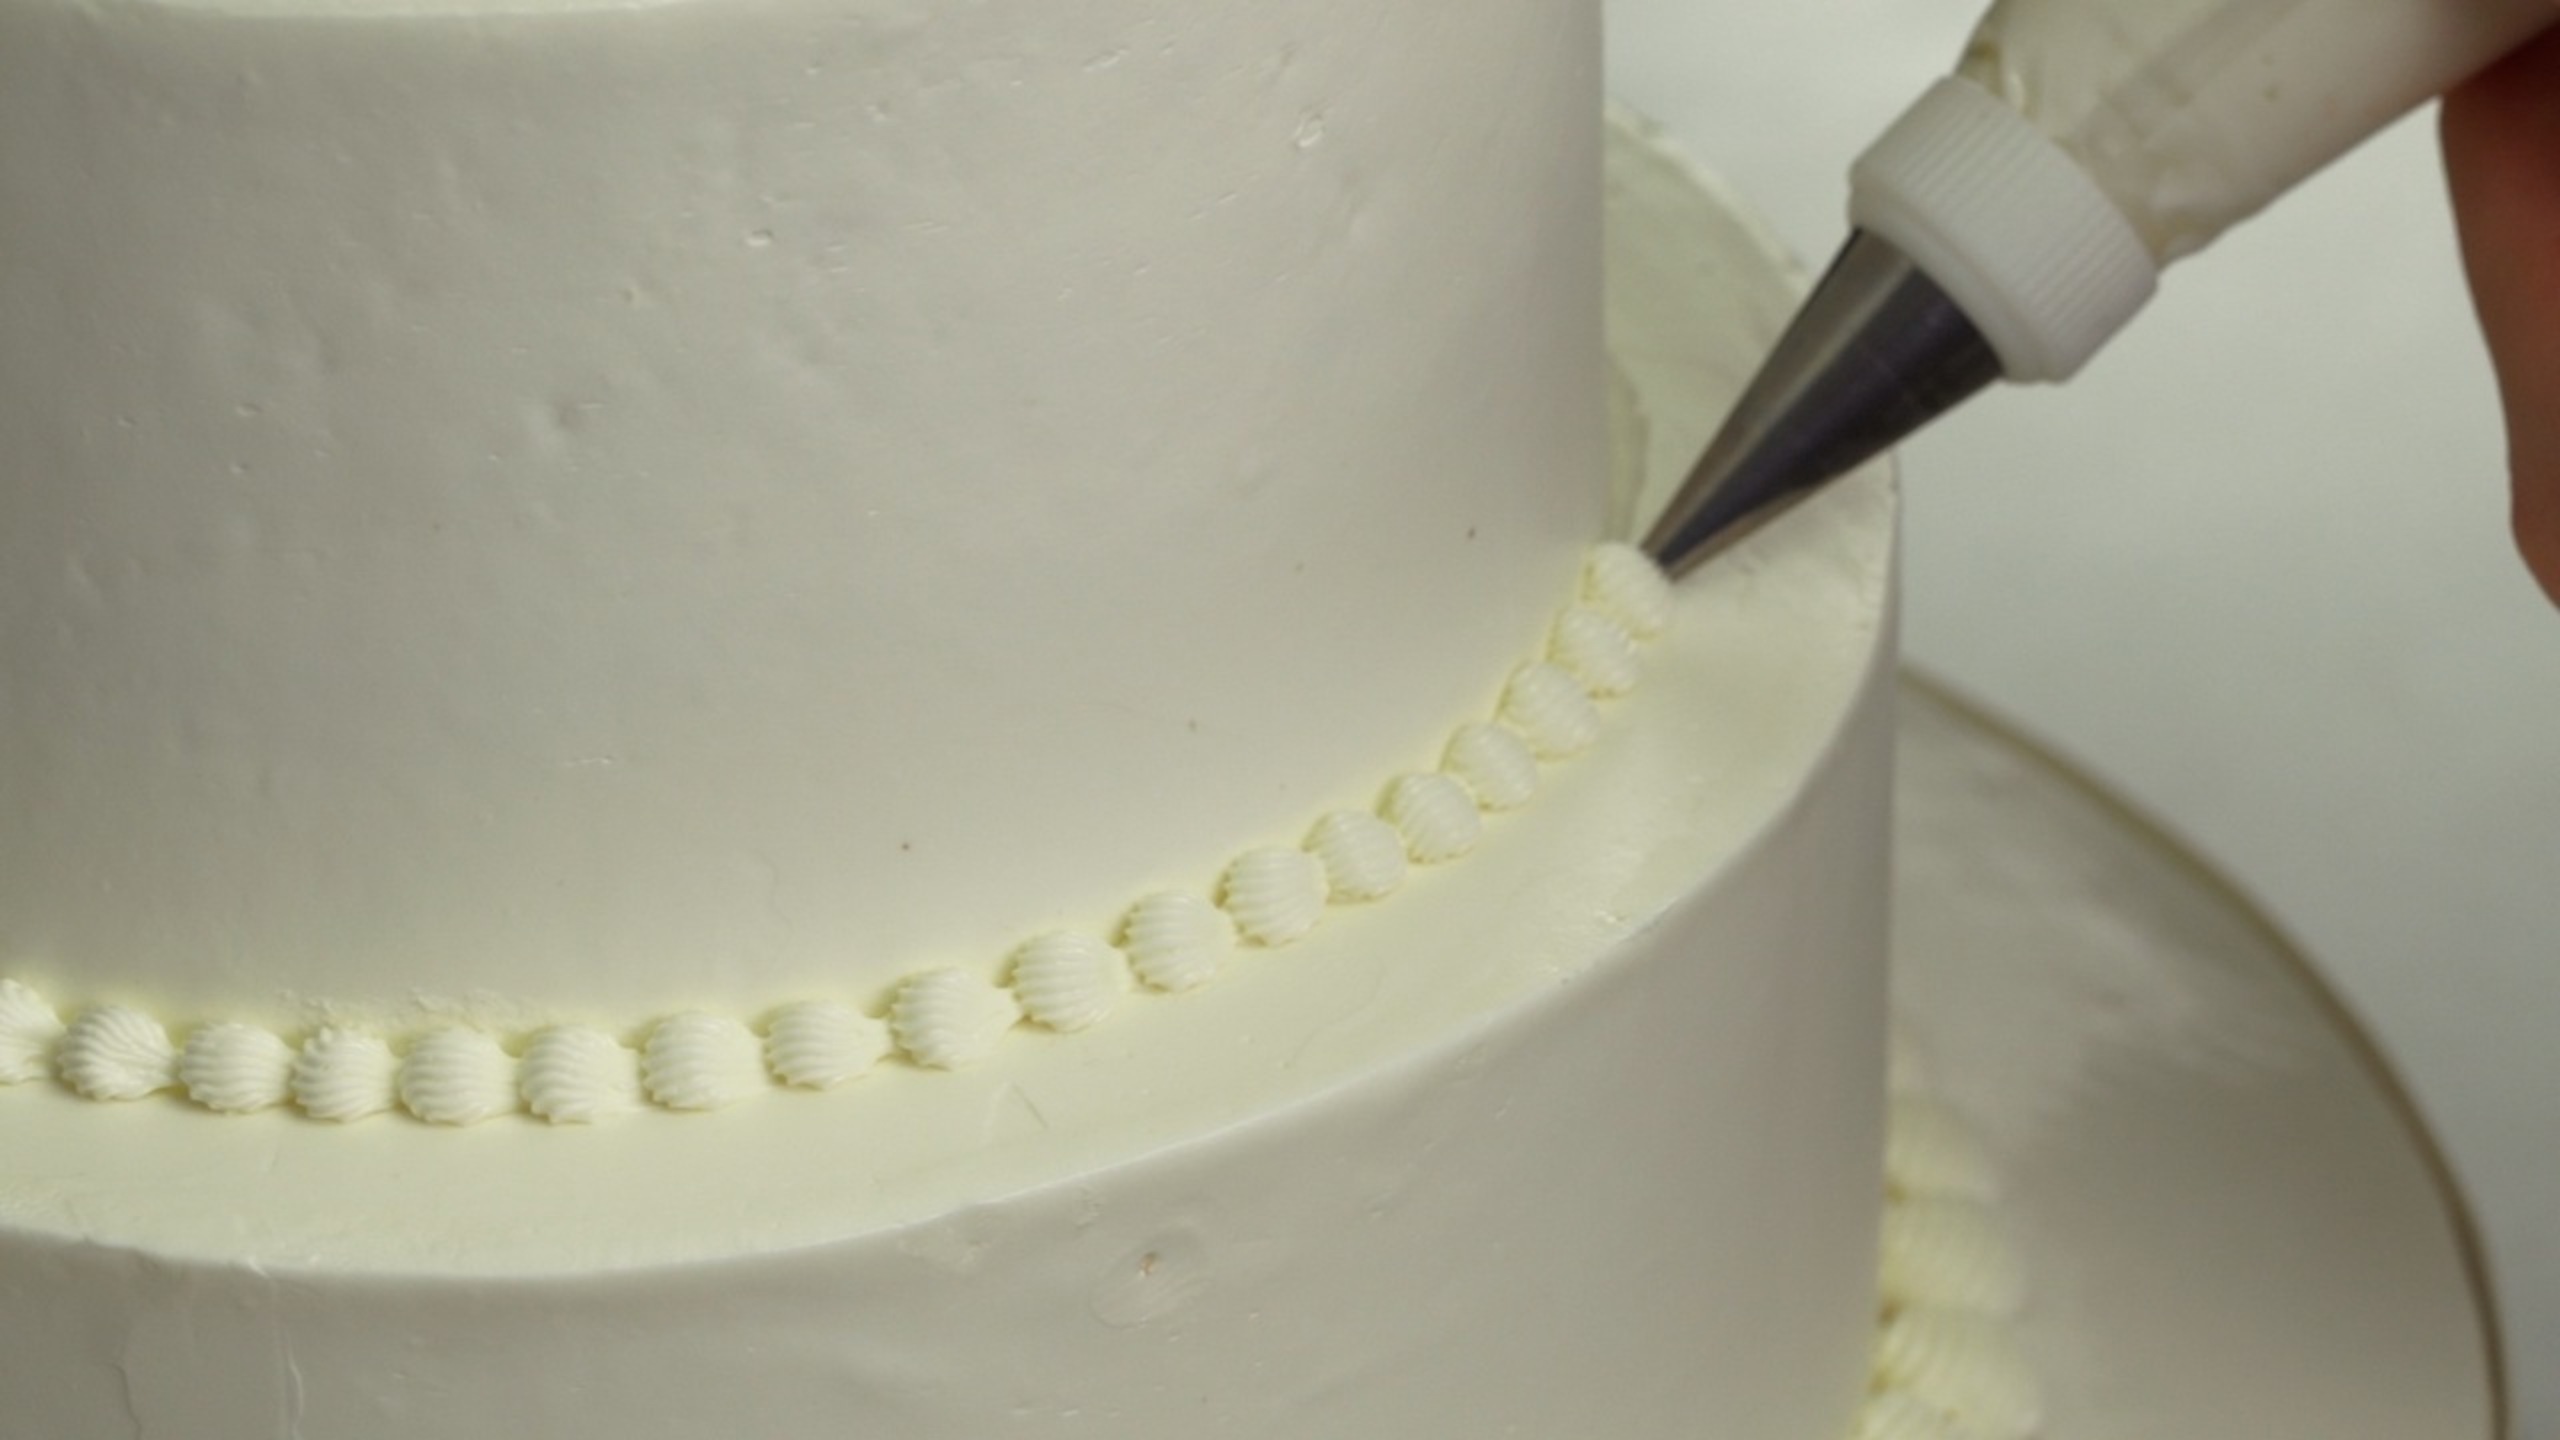
To finish the cake, pipe a decorative shell border using a star pastry tip to cover the seam between the cake and fondant board, starting at the back seam.
Change to a smaller star pastry tip and pipe a shell border between the two cakes, starting at the back seam.
Step 6: Finishing the Details
Step 7: Storage & Shelf Life
Refrigerate a completed cake for two to three days or freeze for up to one month. Also, freeze the sponge layers individually for about two hours. Then tightly wrap them in plastic and freeze for up to one month. To defrost, transfer each wrapped layer to the refrigerator for about twelve hours. Then unwrap the cake layers and proceed building and frosting with buttercream per our lesson’s instructions. If you remove the plastic wrap too soon, condensation builds up, making them soggy.